I’ve been playing with Paths and Text looking at what GIMP can do with these two and have a few tutorials in my head. This is the first! This tutorial will walk you through the steps to create a Date Stamp which can be placed onto your Digital Scrapbook Layout as a creative way of documenting the date.
We will start by creating a Path from a Selection and placing the Text along the newly created Path. The image created by these actions will be filled with color and maneuvered into place. The final step will be to merge all layers onto one and saving as a PNG so you can place onto a Digital Scrapbook layout.
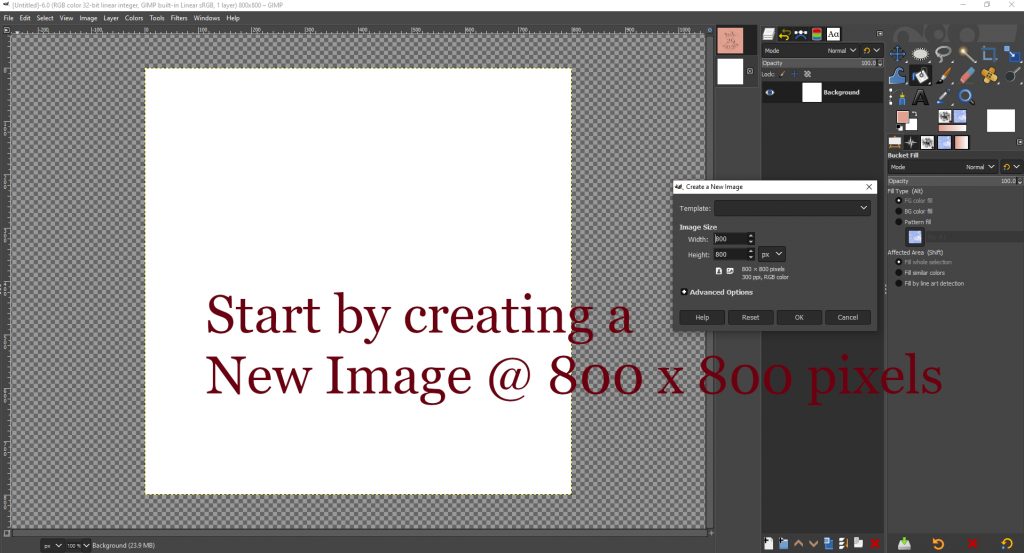
First step is to create a New Image 800 x 800 pixels at a resolution of 300 ppi. I created mine with a background color of white to provide a nice contrast for the tutorial photos.
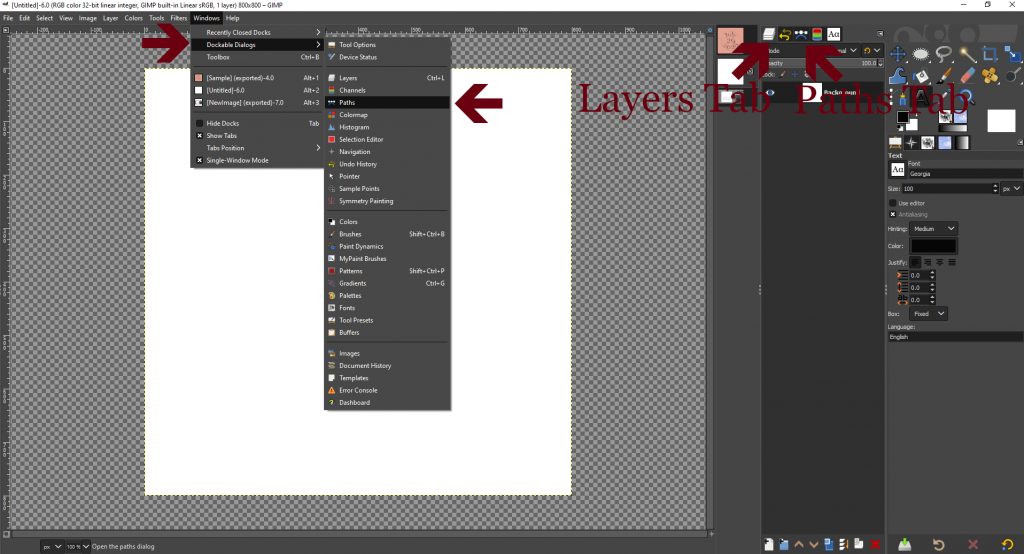
Both a Layers Tab and a Paths Tab are needed on the Layer Palette. If you do not have them, access the “Windows” menu along the top of your GIMP and choose the “Dockable Dialogs” option and select “Paths” tab. You can anchor it in the Layer Palette alongside the Layers Tab.
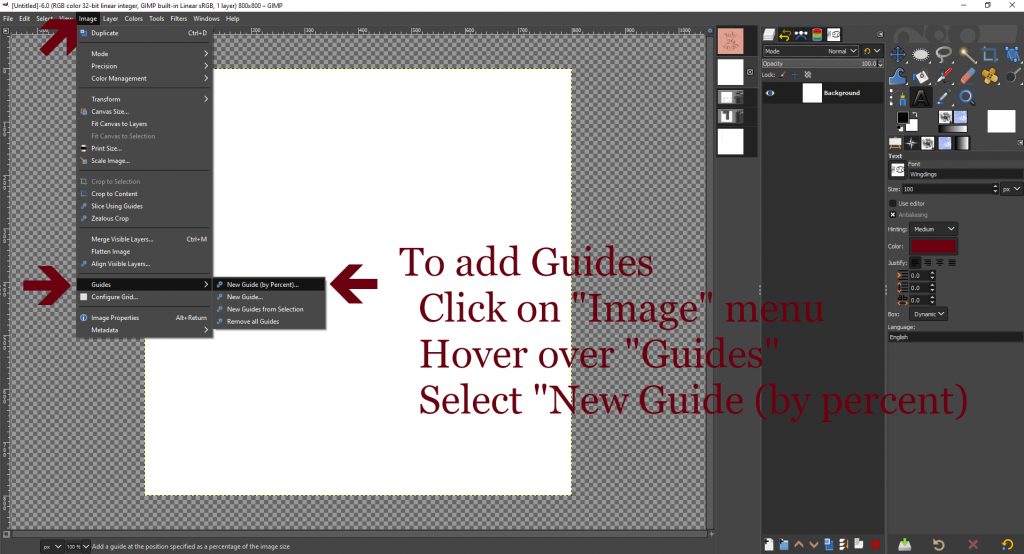
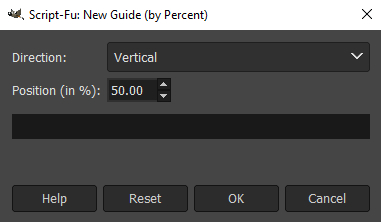
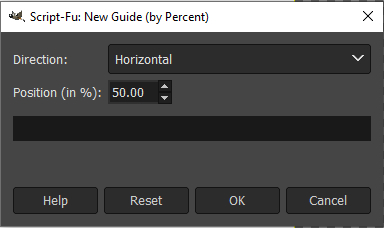
To assist with placement, you will want to add Guides to your Image. Access the guides from the Image menu along the top of your GIMP, hover over “Guides” and Select “New Guide (by percent)”. Once the new window appears, select 50 % and Vertical, click “OK”. Repeat this for the Horizontal guide as well.
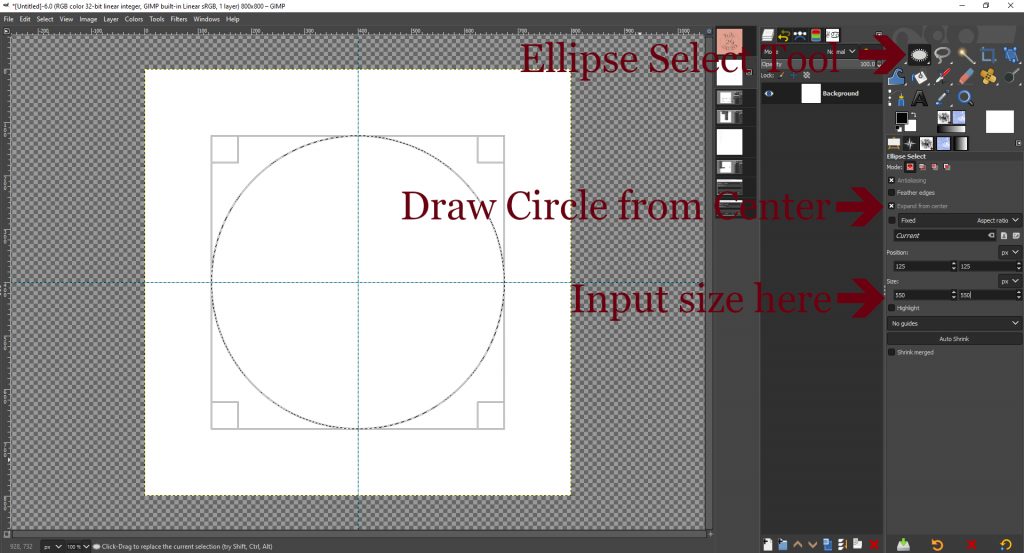
To draw the circle, select the Ellipse Select Tool and confirm “draw from center” is selected on the Tool Options tab. Place your cursor at the center of your image and draw the circle. Return to the Tool Options tab and enter your size of 550 x 550 pixels.
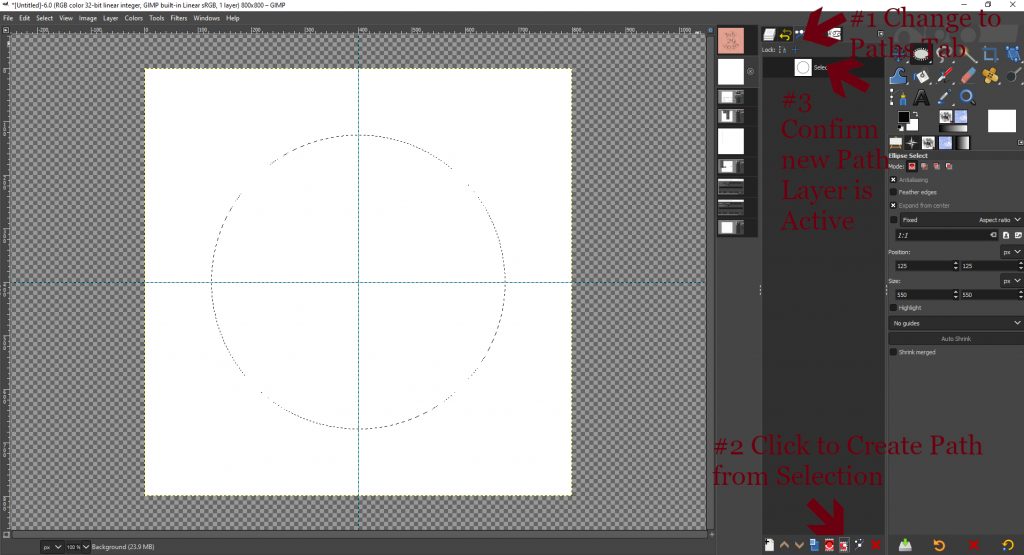
Now that you have your circle selected, change to the Paths Tab and click on the “Create Path from Selection” icon along the bottom of the Layer Palette. confirm your new Path layer is active and return to the Layer Tab.
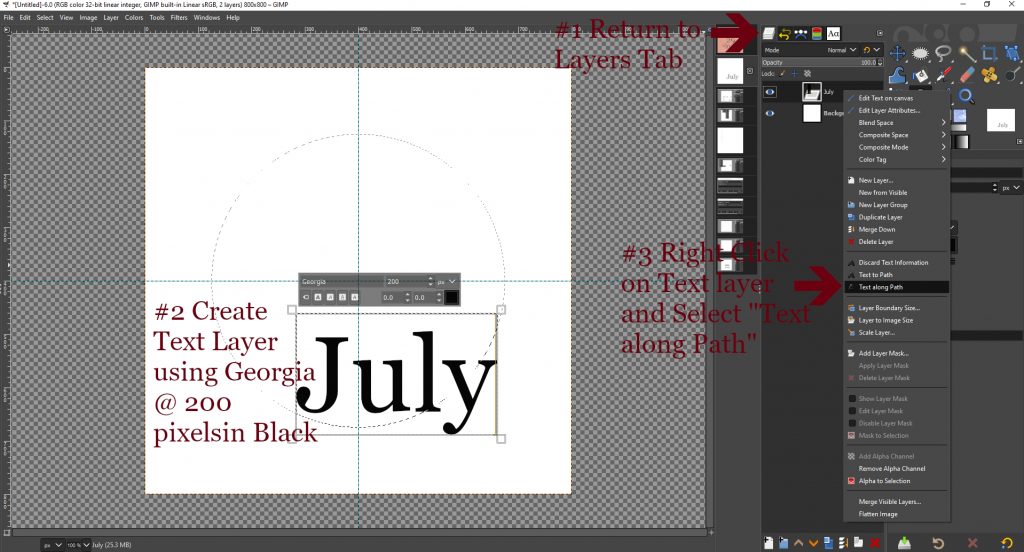
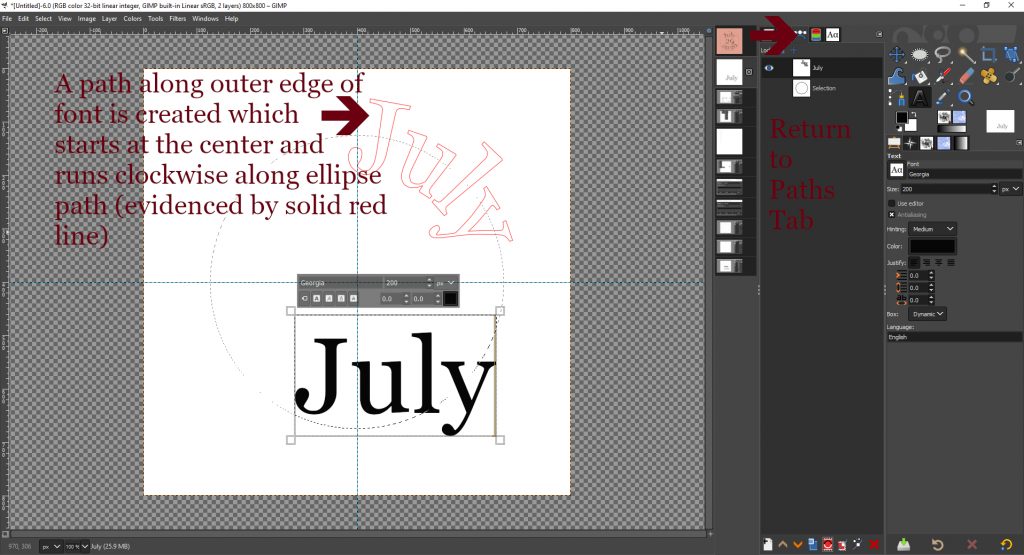
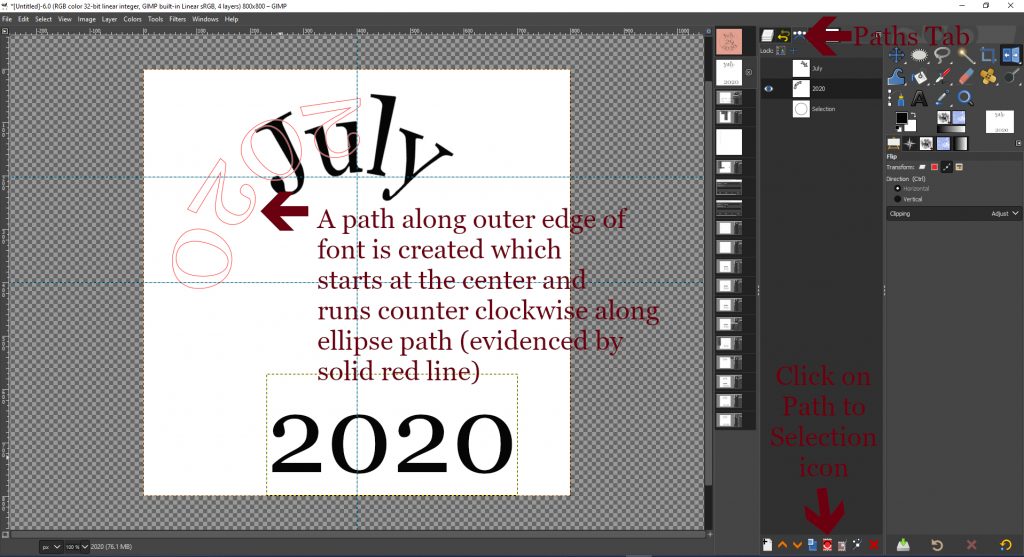
Create a Text Layer using Georgia (or your preferred font) @ 200 pixels and Black. Right click on this layer and select “Text along Path”. A path along the outer edges of the font is created which starts at the center and runs clockwise along the ellipse path. This is evidenced by the solid red line. Return to the Paths tab.
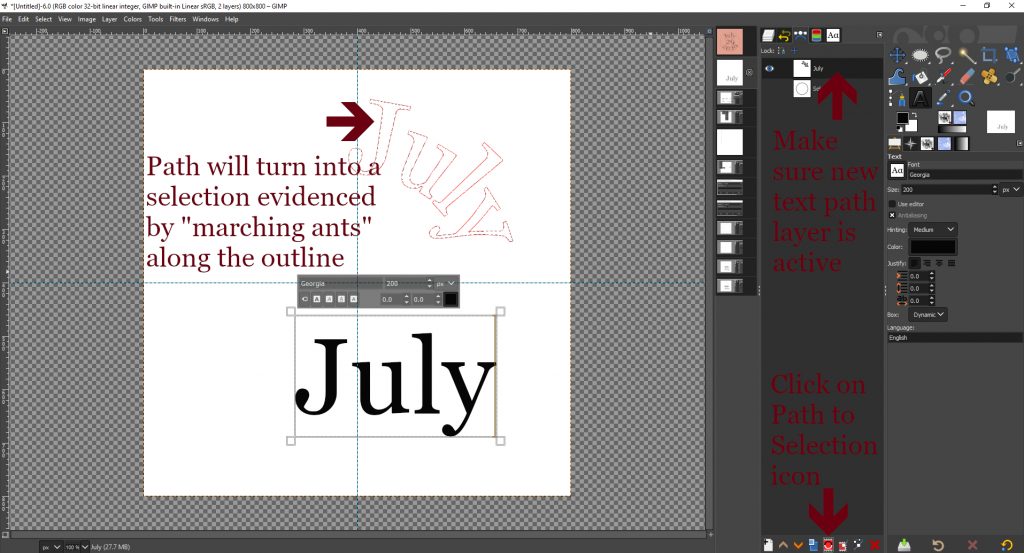
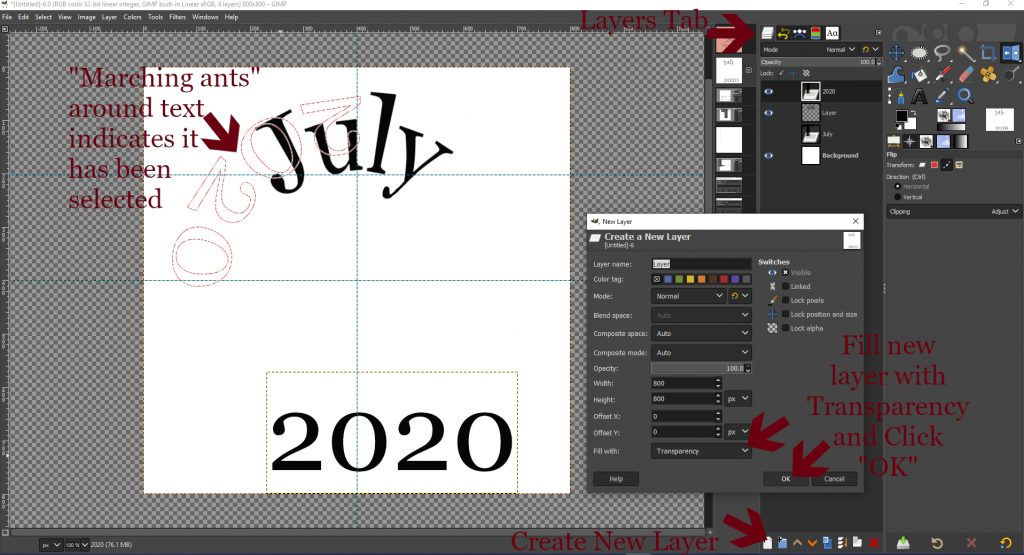
On the Paths tab, click on the “Path to Selection” icon to create a selection from the newly created path. Once the selection is made, “marching ants” will appear along the path.

Return to the Layers Tab and create a New Transparent Layer. With this layer active, choose your preference for filling the selection with your choice of color.
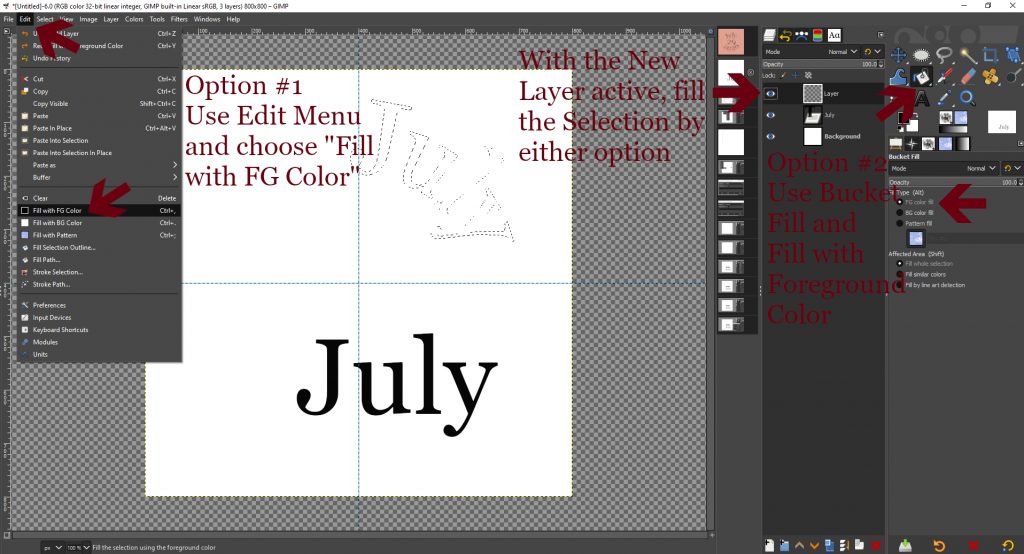
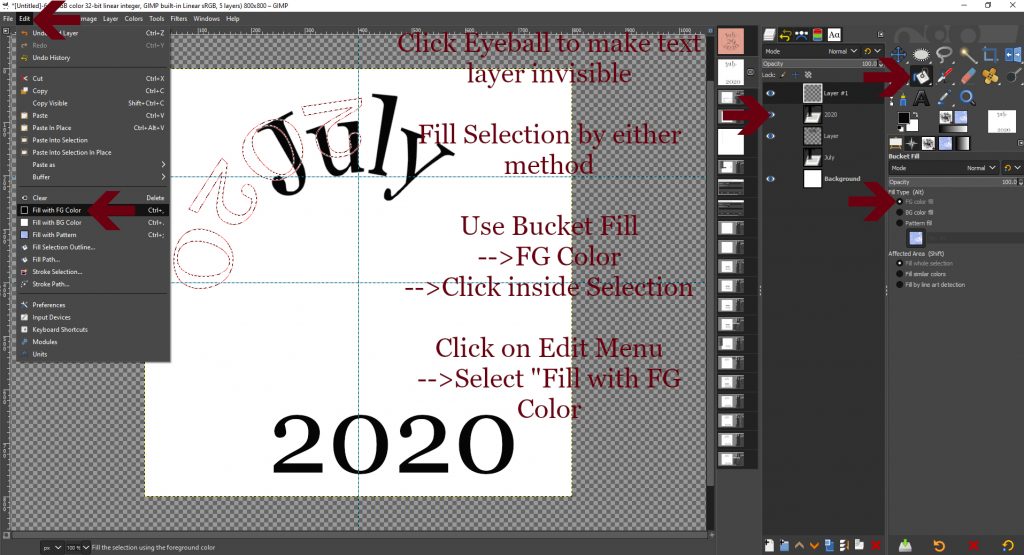
Either select the Edit menu from the top menu options and choose “Fill with FG color” or Select the Bucket Fill tool, confirm fill with FG color is selected, and click with your mouse inside the selected area to fill.
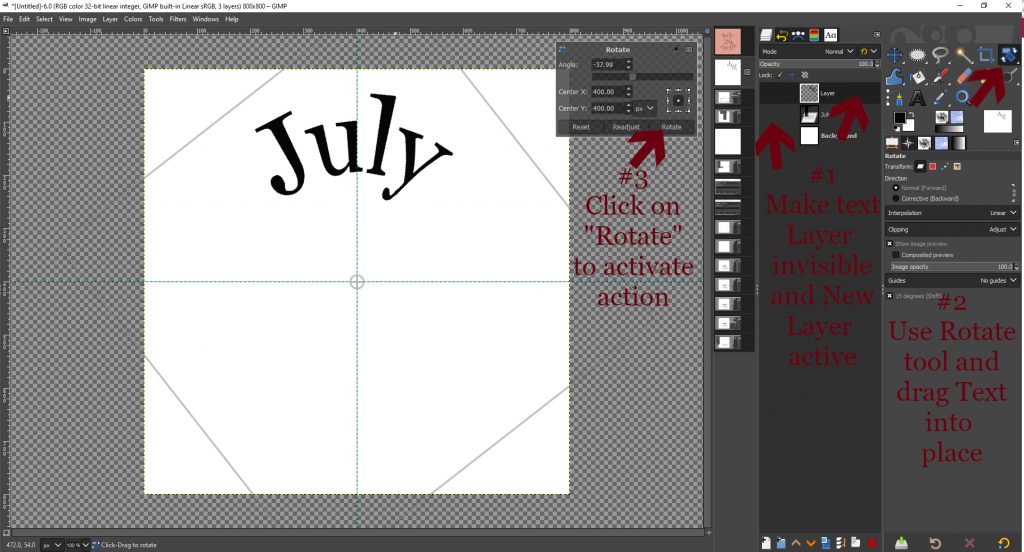
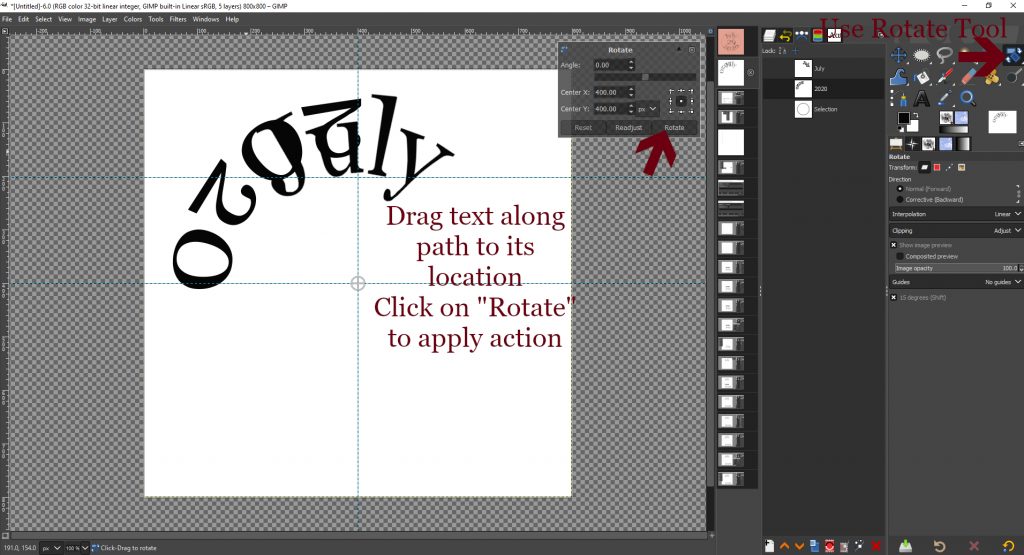
Once the selection has been filled, you can make the text layer invisible or delete it and use the Rotate tool to move the text into place. A guide can be used to confirm your placement is symmetrical.
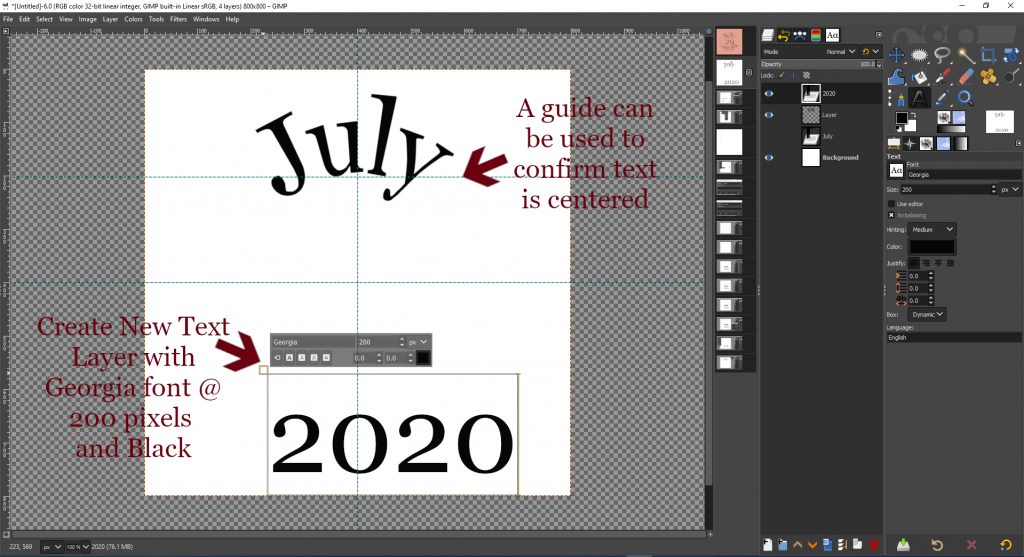
Create a new text layer for the bottom line. Use your preferred font, size, and color.
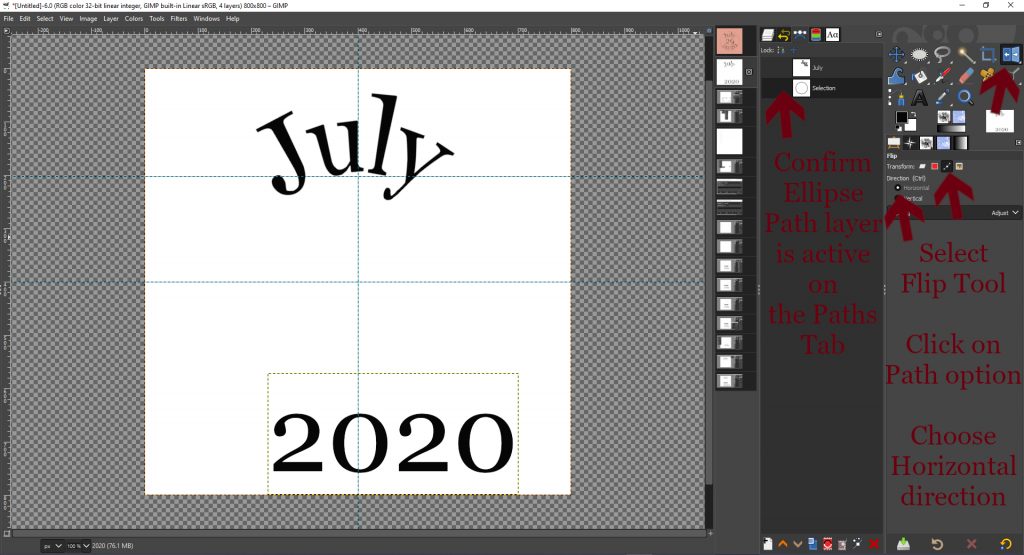
Before this line of text is applied to the path, the path will need to be flipped. Currently the path will run clockwise, the second line of text needs to run counter clockwise. Use the Flip Tool. On the Tool Options tab, select the Path option and click on Horizontal direction. Now click on the image to apply the action.
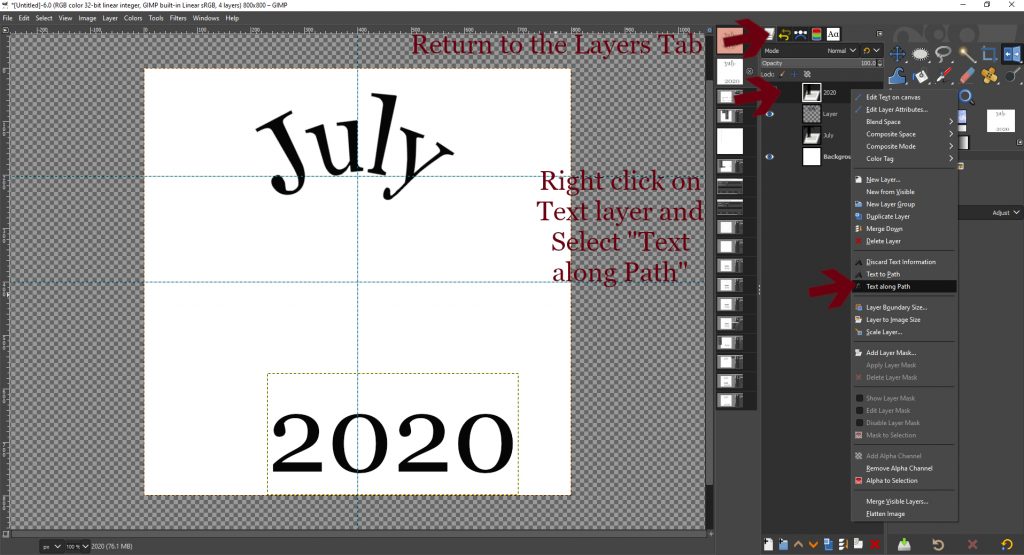
With the circle path layer active, return to the Layers Tab, right click on the second line of text layer, and choose the “Text along Path” option. A new path will appear starting at the center and running counter clockwise.
Return to the Paths tab and repeat the actions from before, by clicking on the “Path to Selection” icon which will draw a selection around the newly created path signified by “marching ants”.
Return to the Layers palette and create a new transparent layer and fill the selection by your preferred method.
Hide or delete the text layer and use the Rotate tool to place the second line of text into its location.
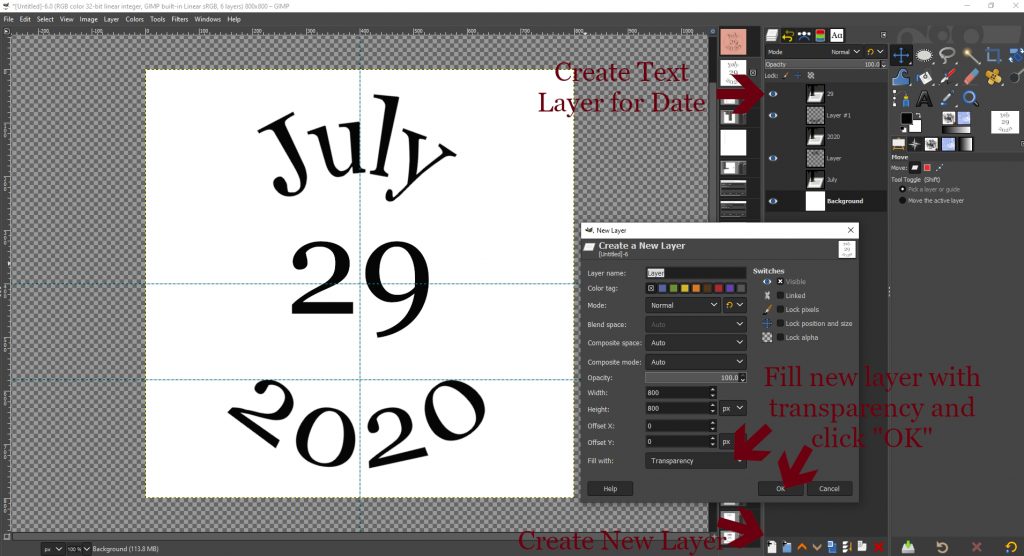
Create a new text layer and enter the date.
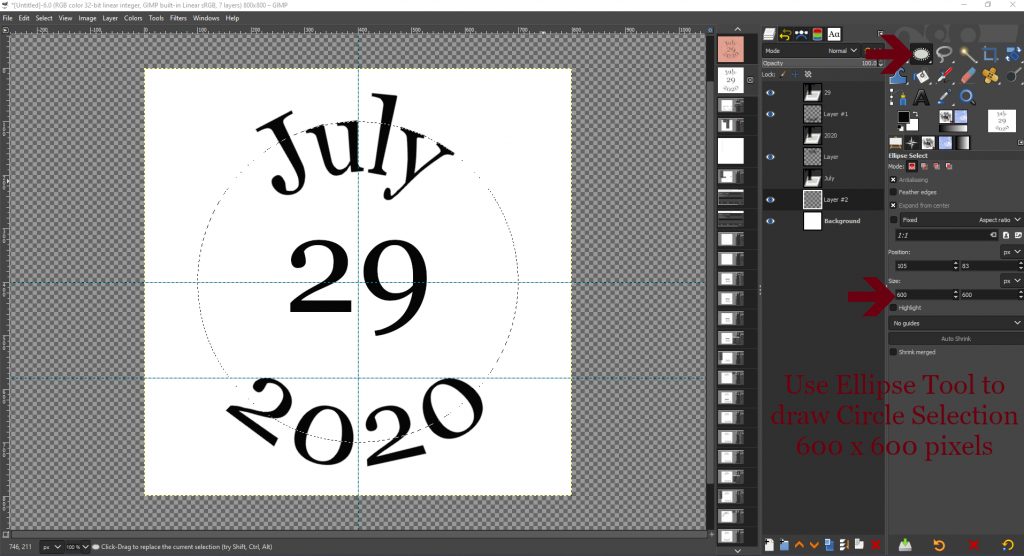
To draw a circle around the date, create a New transparent Layer and use the Ellipse tool to draw a 600 x 600 pixel circle.
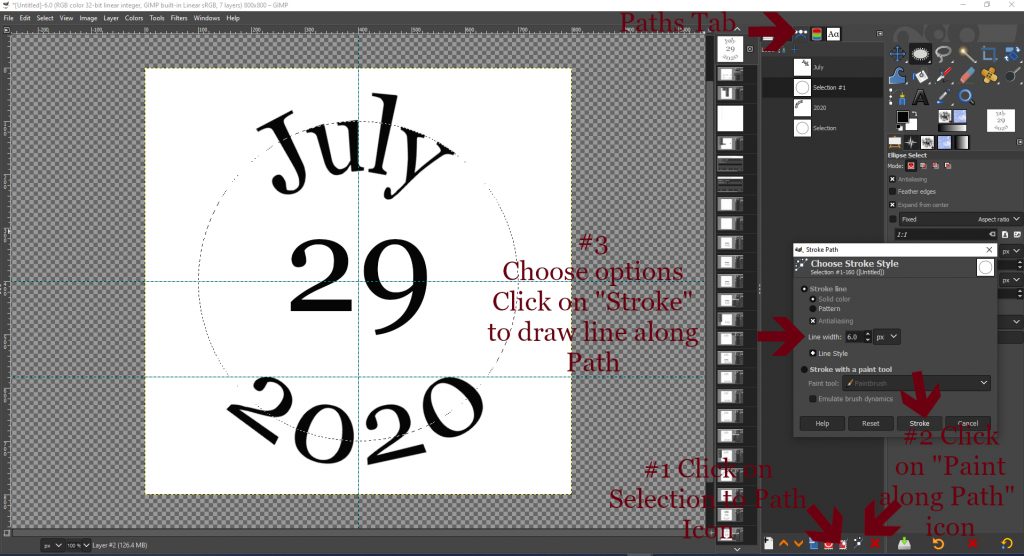
On the Paths Tab, click on the “Selection to Path” icon to create a path from the newly created circle selection. Next, click on the “Paint along Path” icon just to the right. A new box will appear with options, choose your preferred options and click on the “Stroke” box to draw a line along the Path.
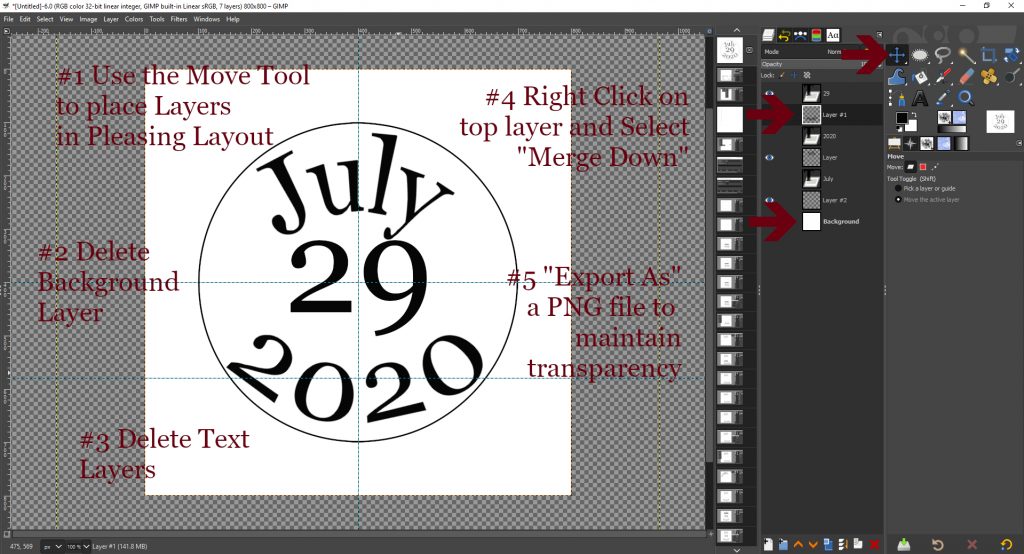
Use the Move tool to drag and drop each of the layers into their preferred location. Delete the background layer to provide transparency for the Date Stamp. Delete text layers if you have not already done so. Merge the layers onto one layer by right clicking on the uppermost layer and choosing “Merge Down”. Export your image as a PNG file to maintain its transparency and use on your next Digital Scrapbook layout to document the date something occurred.
Hopefully, this tutorial was helpful for you as you learn new techniques to use in creating your Digital Scrapbook layouts and continue to Preserve memories for Future Generations!
Let me know if there is something on which you would like a tutorial.
Until next time,